Dot grid paper
I’ve added dot grid paper to the note paper page, in a handful of sizes:

Colophon: I made these with JavaScript/Node, generating SVGs that I then converted into PDFs with Inkscape.
I’ve added dot grid paper to the note paper page, in a handful of sizes:

Colophon: I made these with JavaScript/Node, generating SVGs that I then converted into PDFs with Inkscape.
Inspired by Robert A. Caro’s planning calendar, I’ve redesigned my daily goal charts:
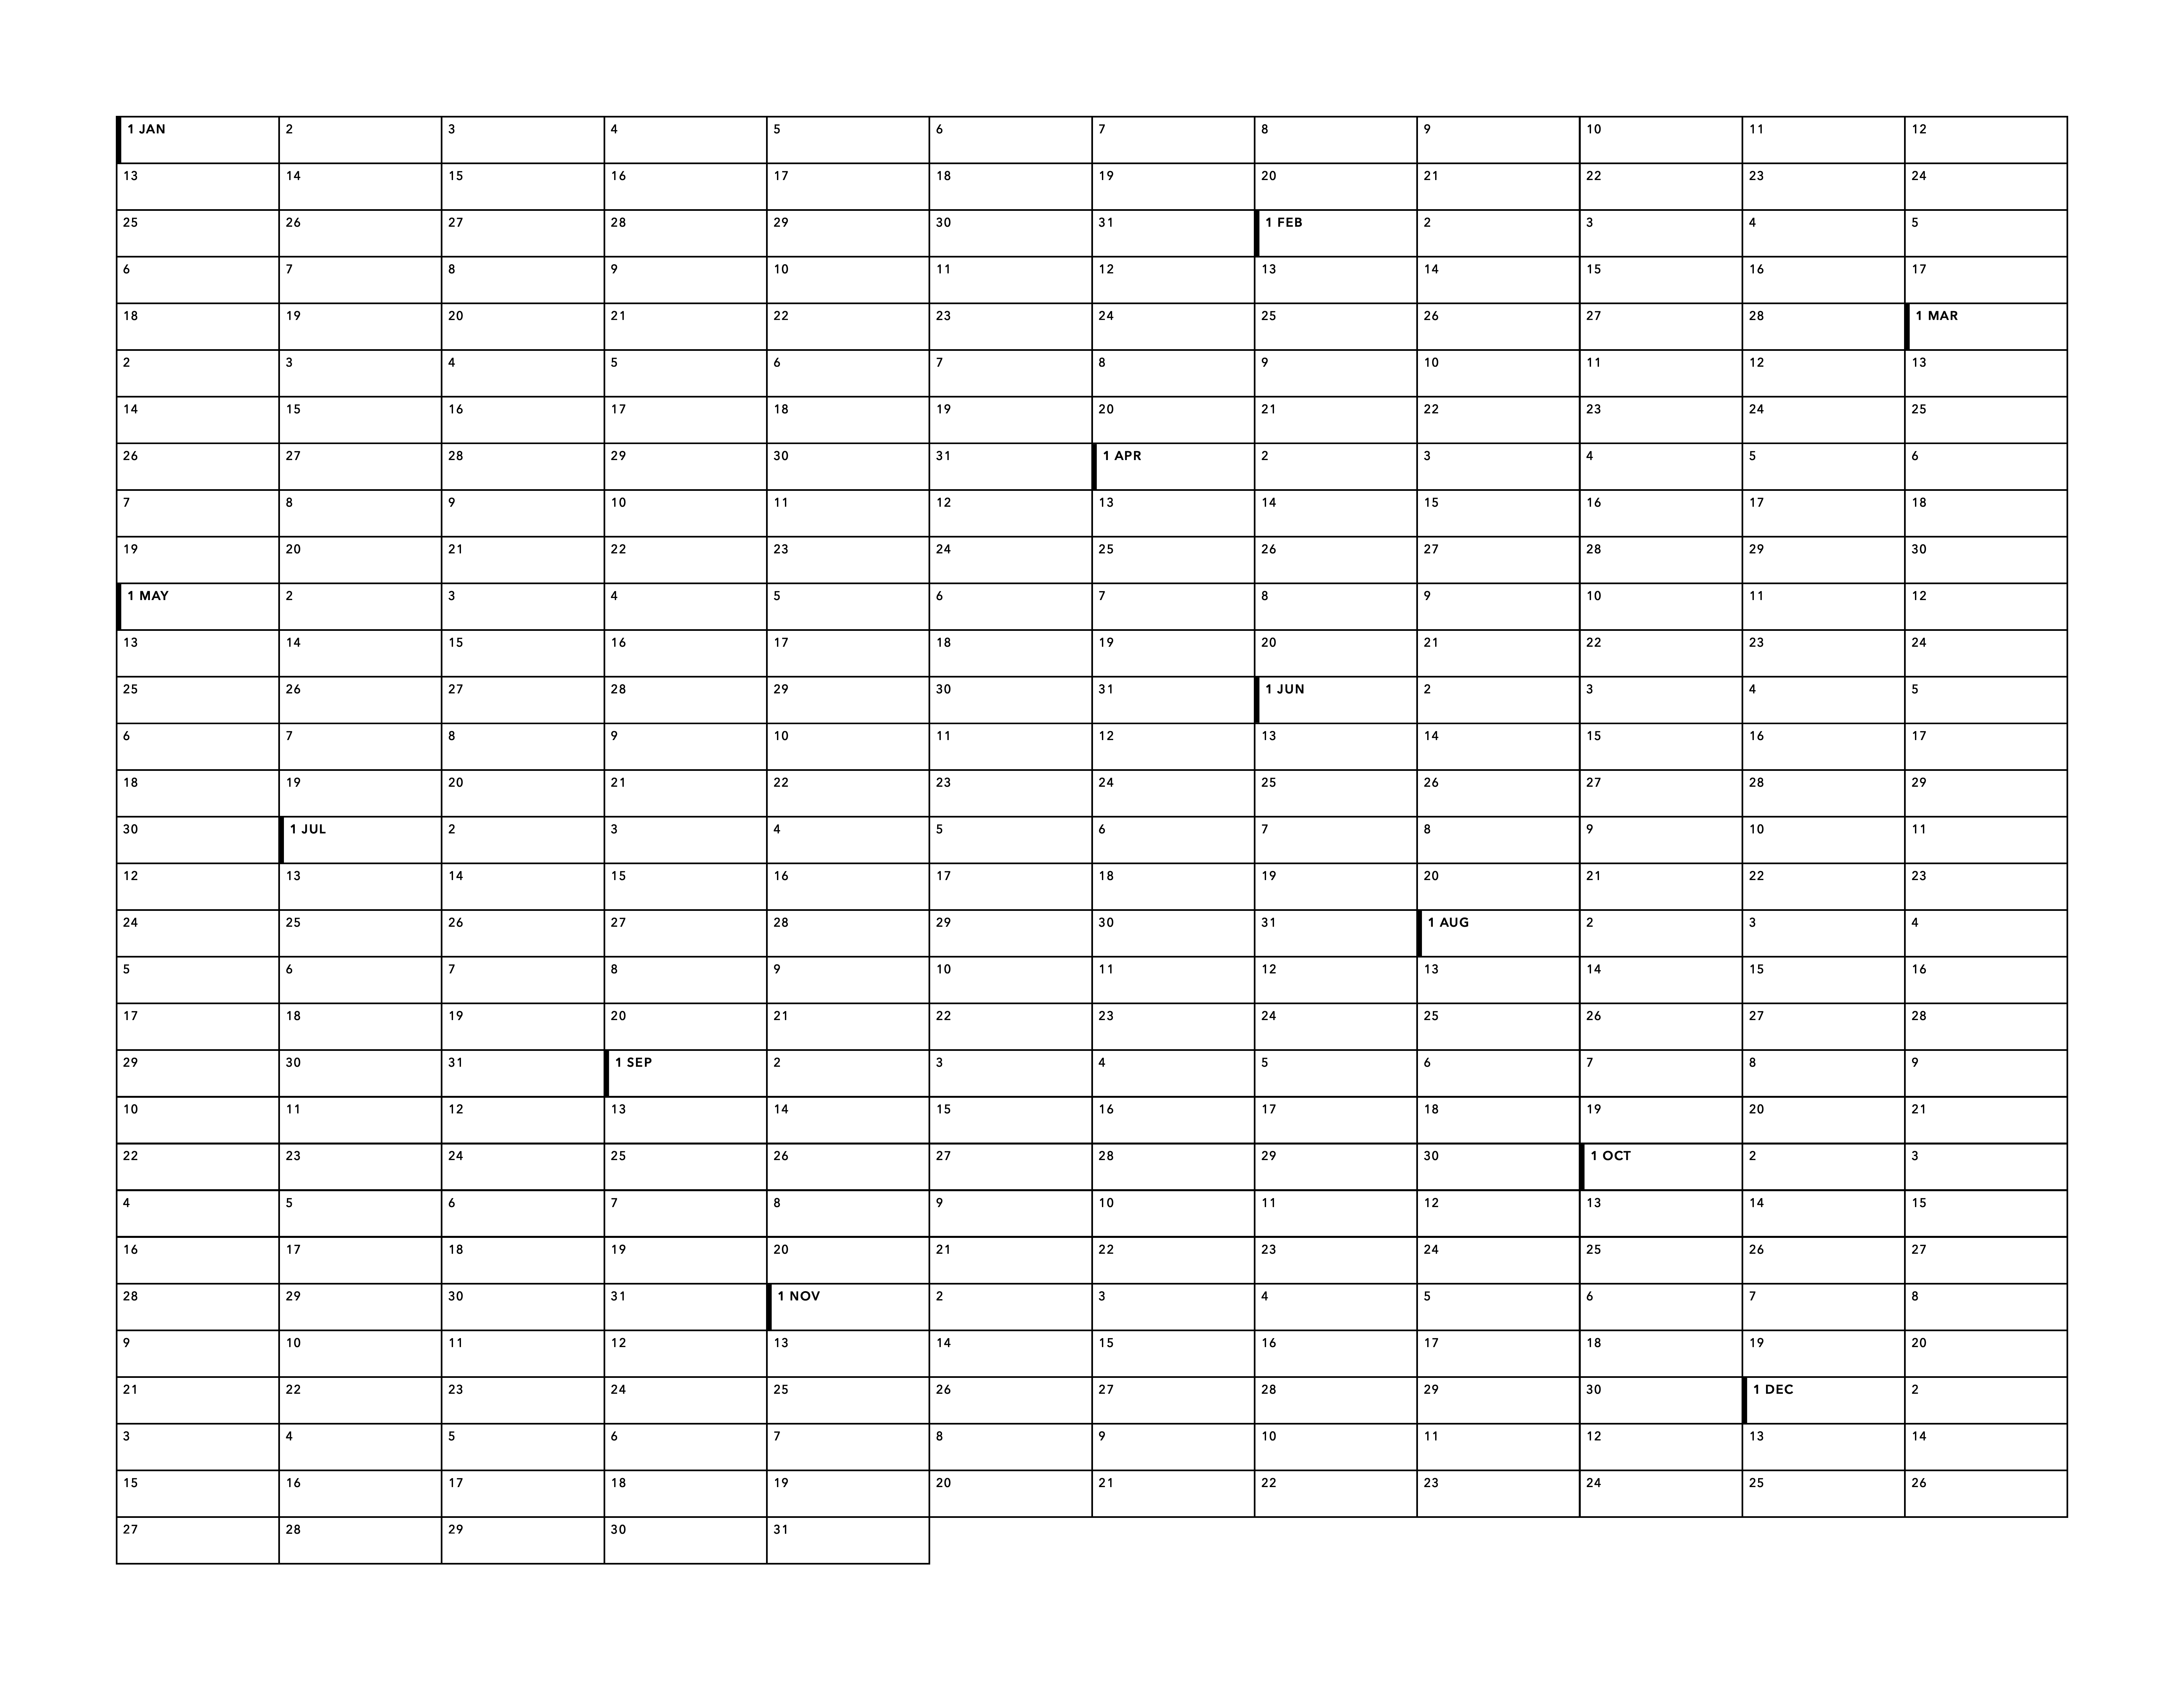
This time the chart doesn’t have a specific year baked in, so it’s reusable. (And there’s a variation for leap years.) It’s freely available as PDFs in both portrait and landscape. Currently just letter size, though maybe someday I’ll start including A4 and other sizes.
Colophon: I made these charts with HTML (it’s just a table), CSS, JavaScript (on page rather than via Node), and Firefox. The font is Avenir Next.
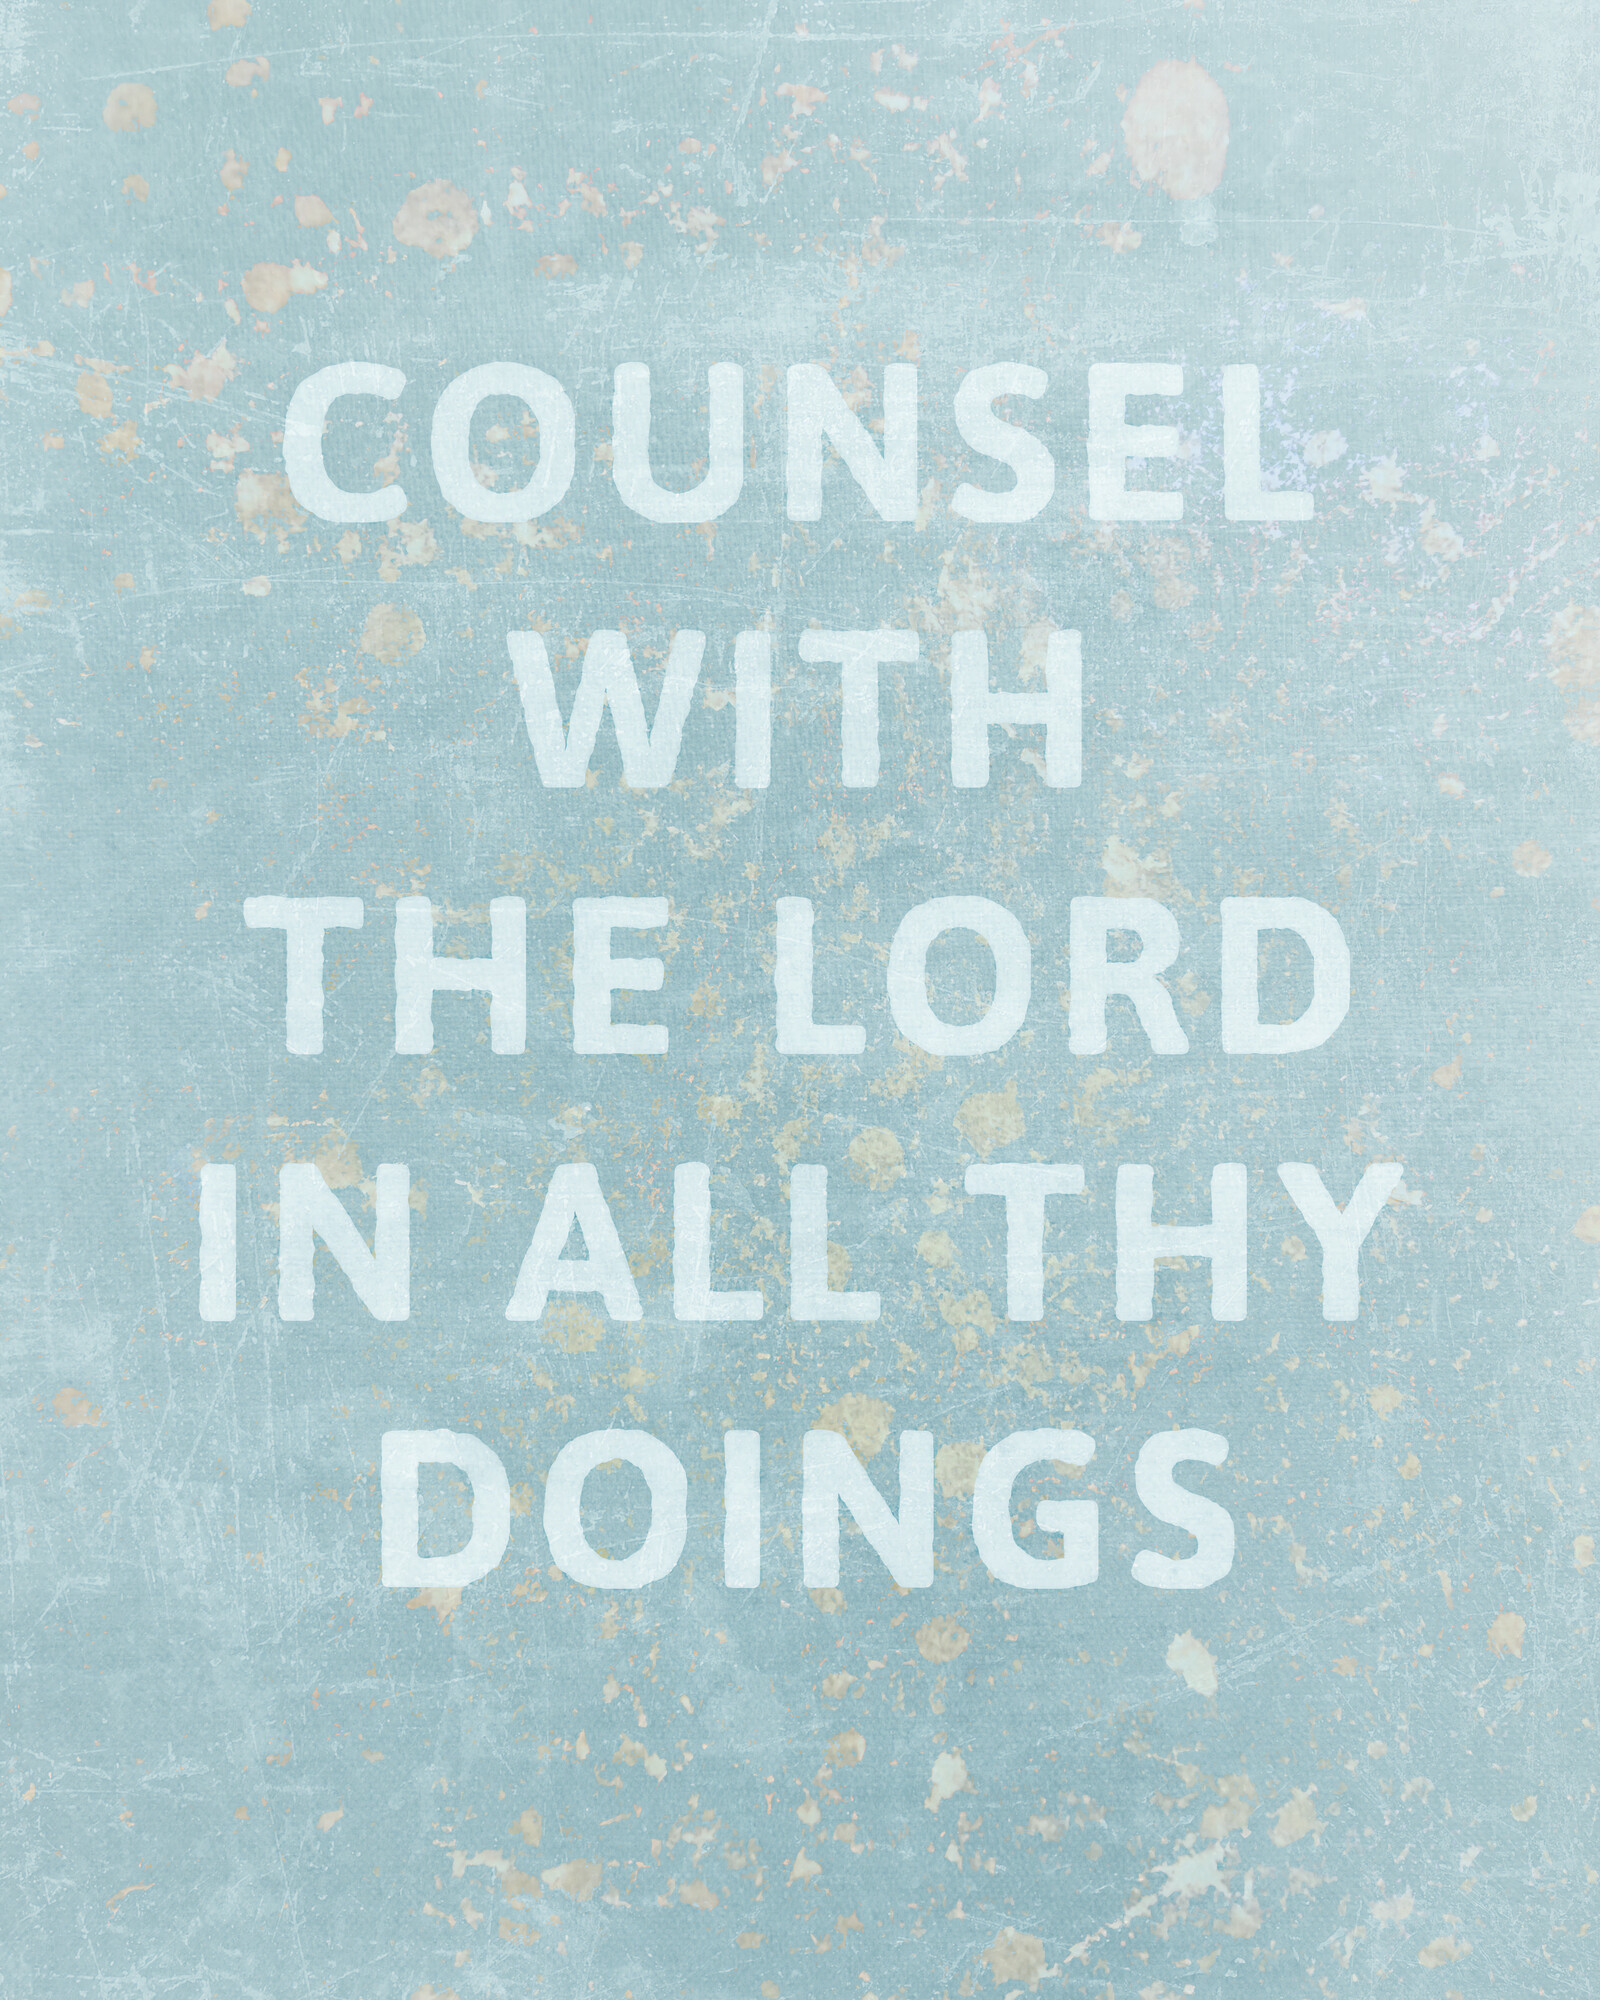
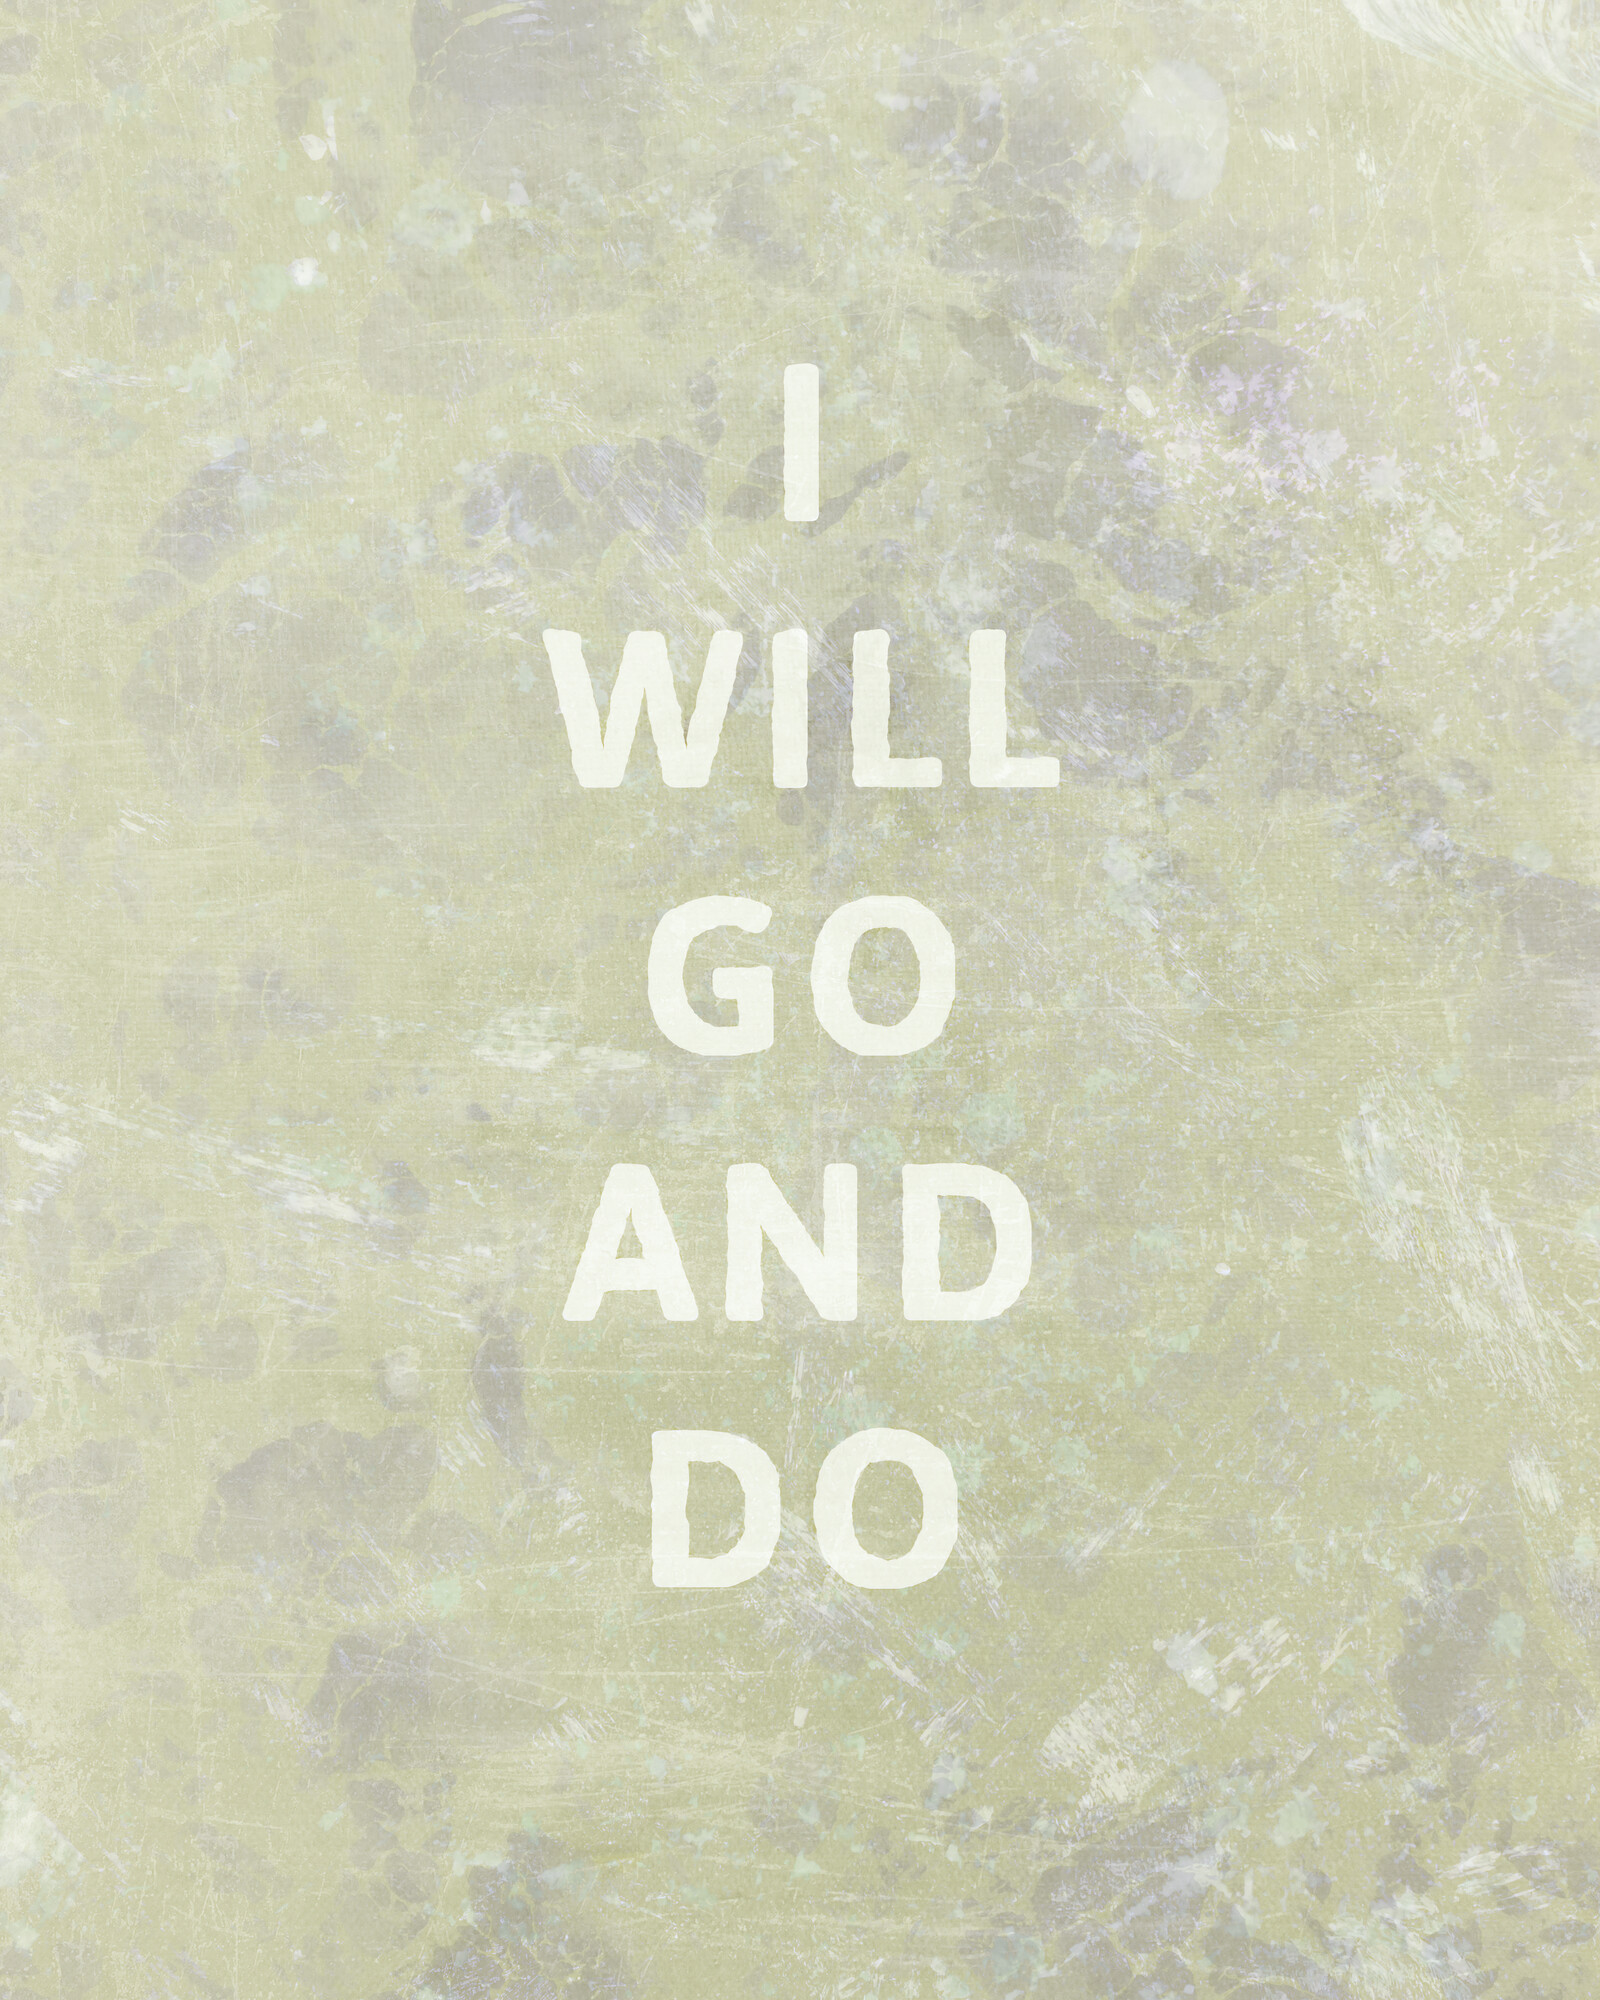
Another experimental new project: scripture posters. Definitely leaning more on the graphic design side of things here. The other day I happened to see This Is How We Do It (a children’s book by Matt Lamothe) lying around, and seeing the cover suddenly gave me an itch to make something similar but with words from the scriptures. I’m sure others have already made designs like this, but I haven’t (till now), so here you go.
Counsel with the Lord in all thy doings (Alma 37:37)
I will go and do (1 Nephi 3:7)
Just added diagonal graph paper to the note paper page. It looks like this:

Why would you use this? No idea. I haven’t been able to come up with any good use cases for it, but the itch needed to be scratched so here we are.
Sidenote: I made the original lined/grid paper with PlotDevice but decided to use SVG instead this time, converting the files to PDF with Inkscape.
Lately I’ve been playing around with implementing genealogy sparklines on the web. Still very much a work in progress, but I’m trying to do more working in public, so here’s the messy current status (and at some point I’ll post the actual HTML/CSS):
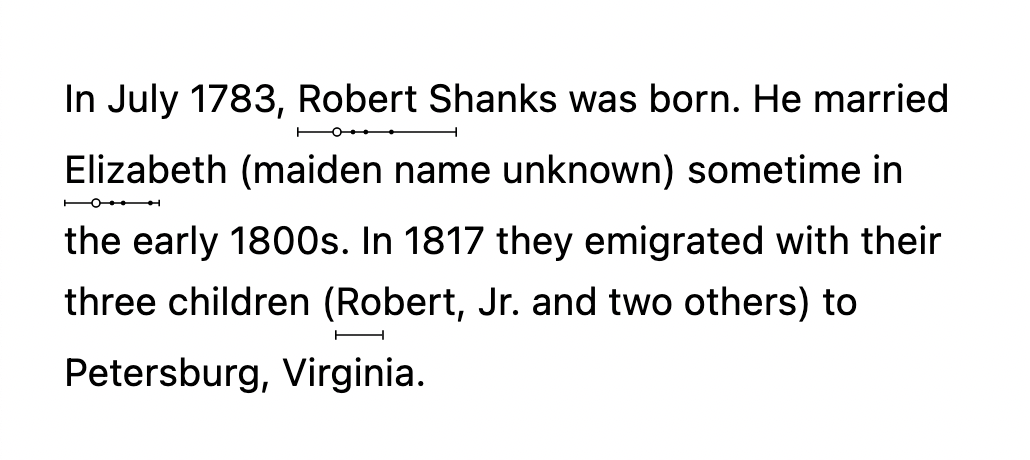
Implementation notes:
<ruby> and <rt> tags, with ruby-position set to under and ruby-align set to start (though only Firefox supports it so it’s not sadly viable for actual use yet)Design notes:
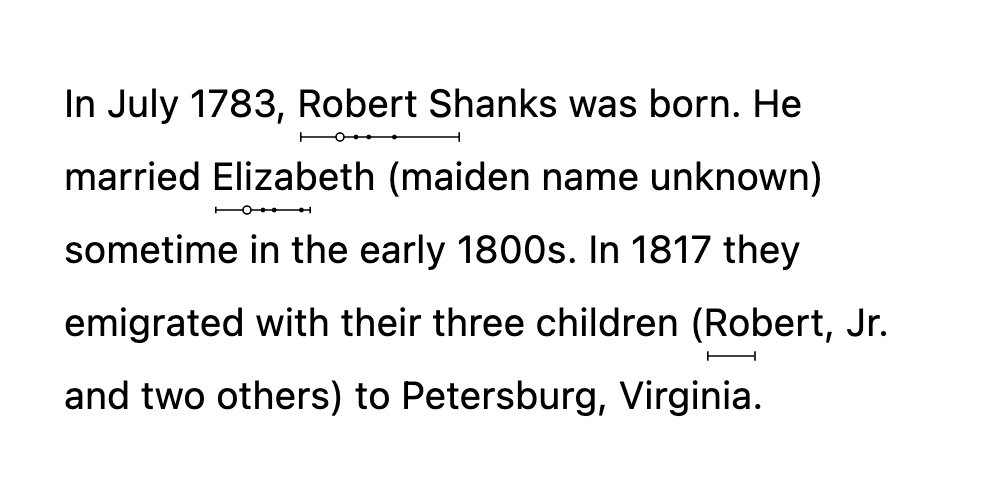
Implementation notes:
span tags with position: relative set, and the SVG gets position: absolute. Fairly simple.span is at the beginning of a line (the sparkline shows up at the end of the previous line), haven’t tried very hard to fix it yetTrying out a new format with these link bundles, in the hope that dropping the bulleted list format is a) more flexible and b) more conducive to writing a bit more about the links, rather than limiting myself to a single line with an awkward semicolon shoved in if I need more room.
Andy Bell on recent/upcoming CSS changes. Good stuff here. I’m probably most looking forward to using :is and clamp() and ch (all of which I’d read about before but had mostly forgotten). Oh, and scroll-margin-top.
Design Engineering Handbook by Natalya Shelburne et al., a free ebook which looks interesting. (I’ve read part of the first chapter so far.) Design Better (which appears to be an InVision thing) has other free books available as well, on various design-related topics.
Max Koehler on continuous typography. Also see his post about the tool and the tool itself. This is great, and I hope these ideas get broader traction. (Also, I’m excited to start using Source Serif 4 and its optical sizing axis.)
Aleksey Kladov on including an ARCHITECTURE.md file. Great idea. Having a high-level overview is so helpful.
Graydon Hoare on always betting on text. I’ve probably linked to this before, but it’s good and worth rereading occasionally.
Another in-progress bit of design, this time from a writing app I’m working on. (Which I’m thinking of as a potential replacement for Storybook.)
One of the core ideas I want to explore with this app is a pane-based layout system, similar to what you get in Blender and After Effects, and in tiling window managers. Here’s what Blender looks like:

There’s a lot going on there, but fundamentally it’s just panes. You can split a pane, merge it with another, resize panes, and change the type and/or contents of a pane.
There is also usually the idea of a workspace, where you can switch between different pane layouts for different types of work. (In Blender, for example, there are workspaces for modeling, shading, animating, compositing, and more.) Photoshop has echoes of this as well, though it’s not fully pane-based.
Some of the advantages of panes (at least in my mind):
And some of the disadvantages of panes:
Because I’m interested in interface design, and because I’ve long wanted to explore this particular space, I’m going to try applying the pane idea to writing. I’m not sure it’s a good fit, but if it’s not, I want to find out which factors determine that, and which types of activities would be better candidates for a layout system like this.
Designing for mobile first, I immediately ran into the hard, cold fact that a phone screen is too small to split into panes.
This got me thinking about what panes do, at a more abstract level. My conclusion: panes let you have multiple things open at a time, in a way that preserves state (where you are in each pane, to use a spatial metaphor).
With that in mind, it seems to me that the closest analogue would be a screen for each pane, with a way to switch between them — similar to the way Safari handles the open tabs in iOS in portrait mode on a phone. This model allows for switching between tasks in a reliable, persistent way on a device with a small screen.
I first brainstormed some possible pane types and came up with this tentative list:
I made some quick sketches and considered turning them into a prototype, but going to wireframes instead seemed a better use of my time (it’s much easier to iterate on wireframes).
Here’s the current state of the prototype (made in Figma with variants and auto layout and Smart Animate). It’s not finished, and it’s still a bit rough, but you can at least start to get the idea:
And some of the screens:
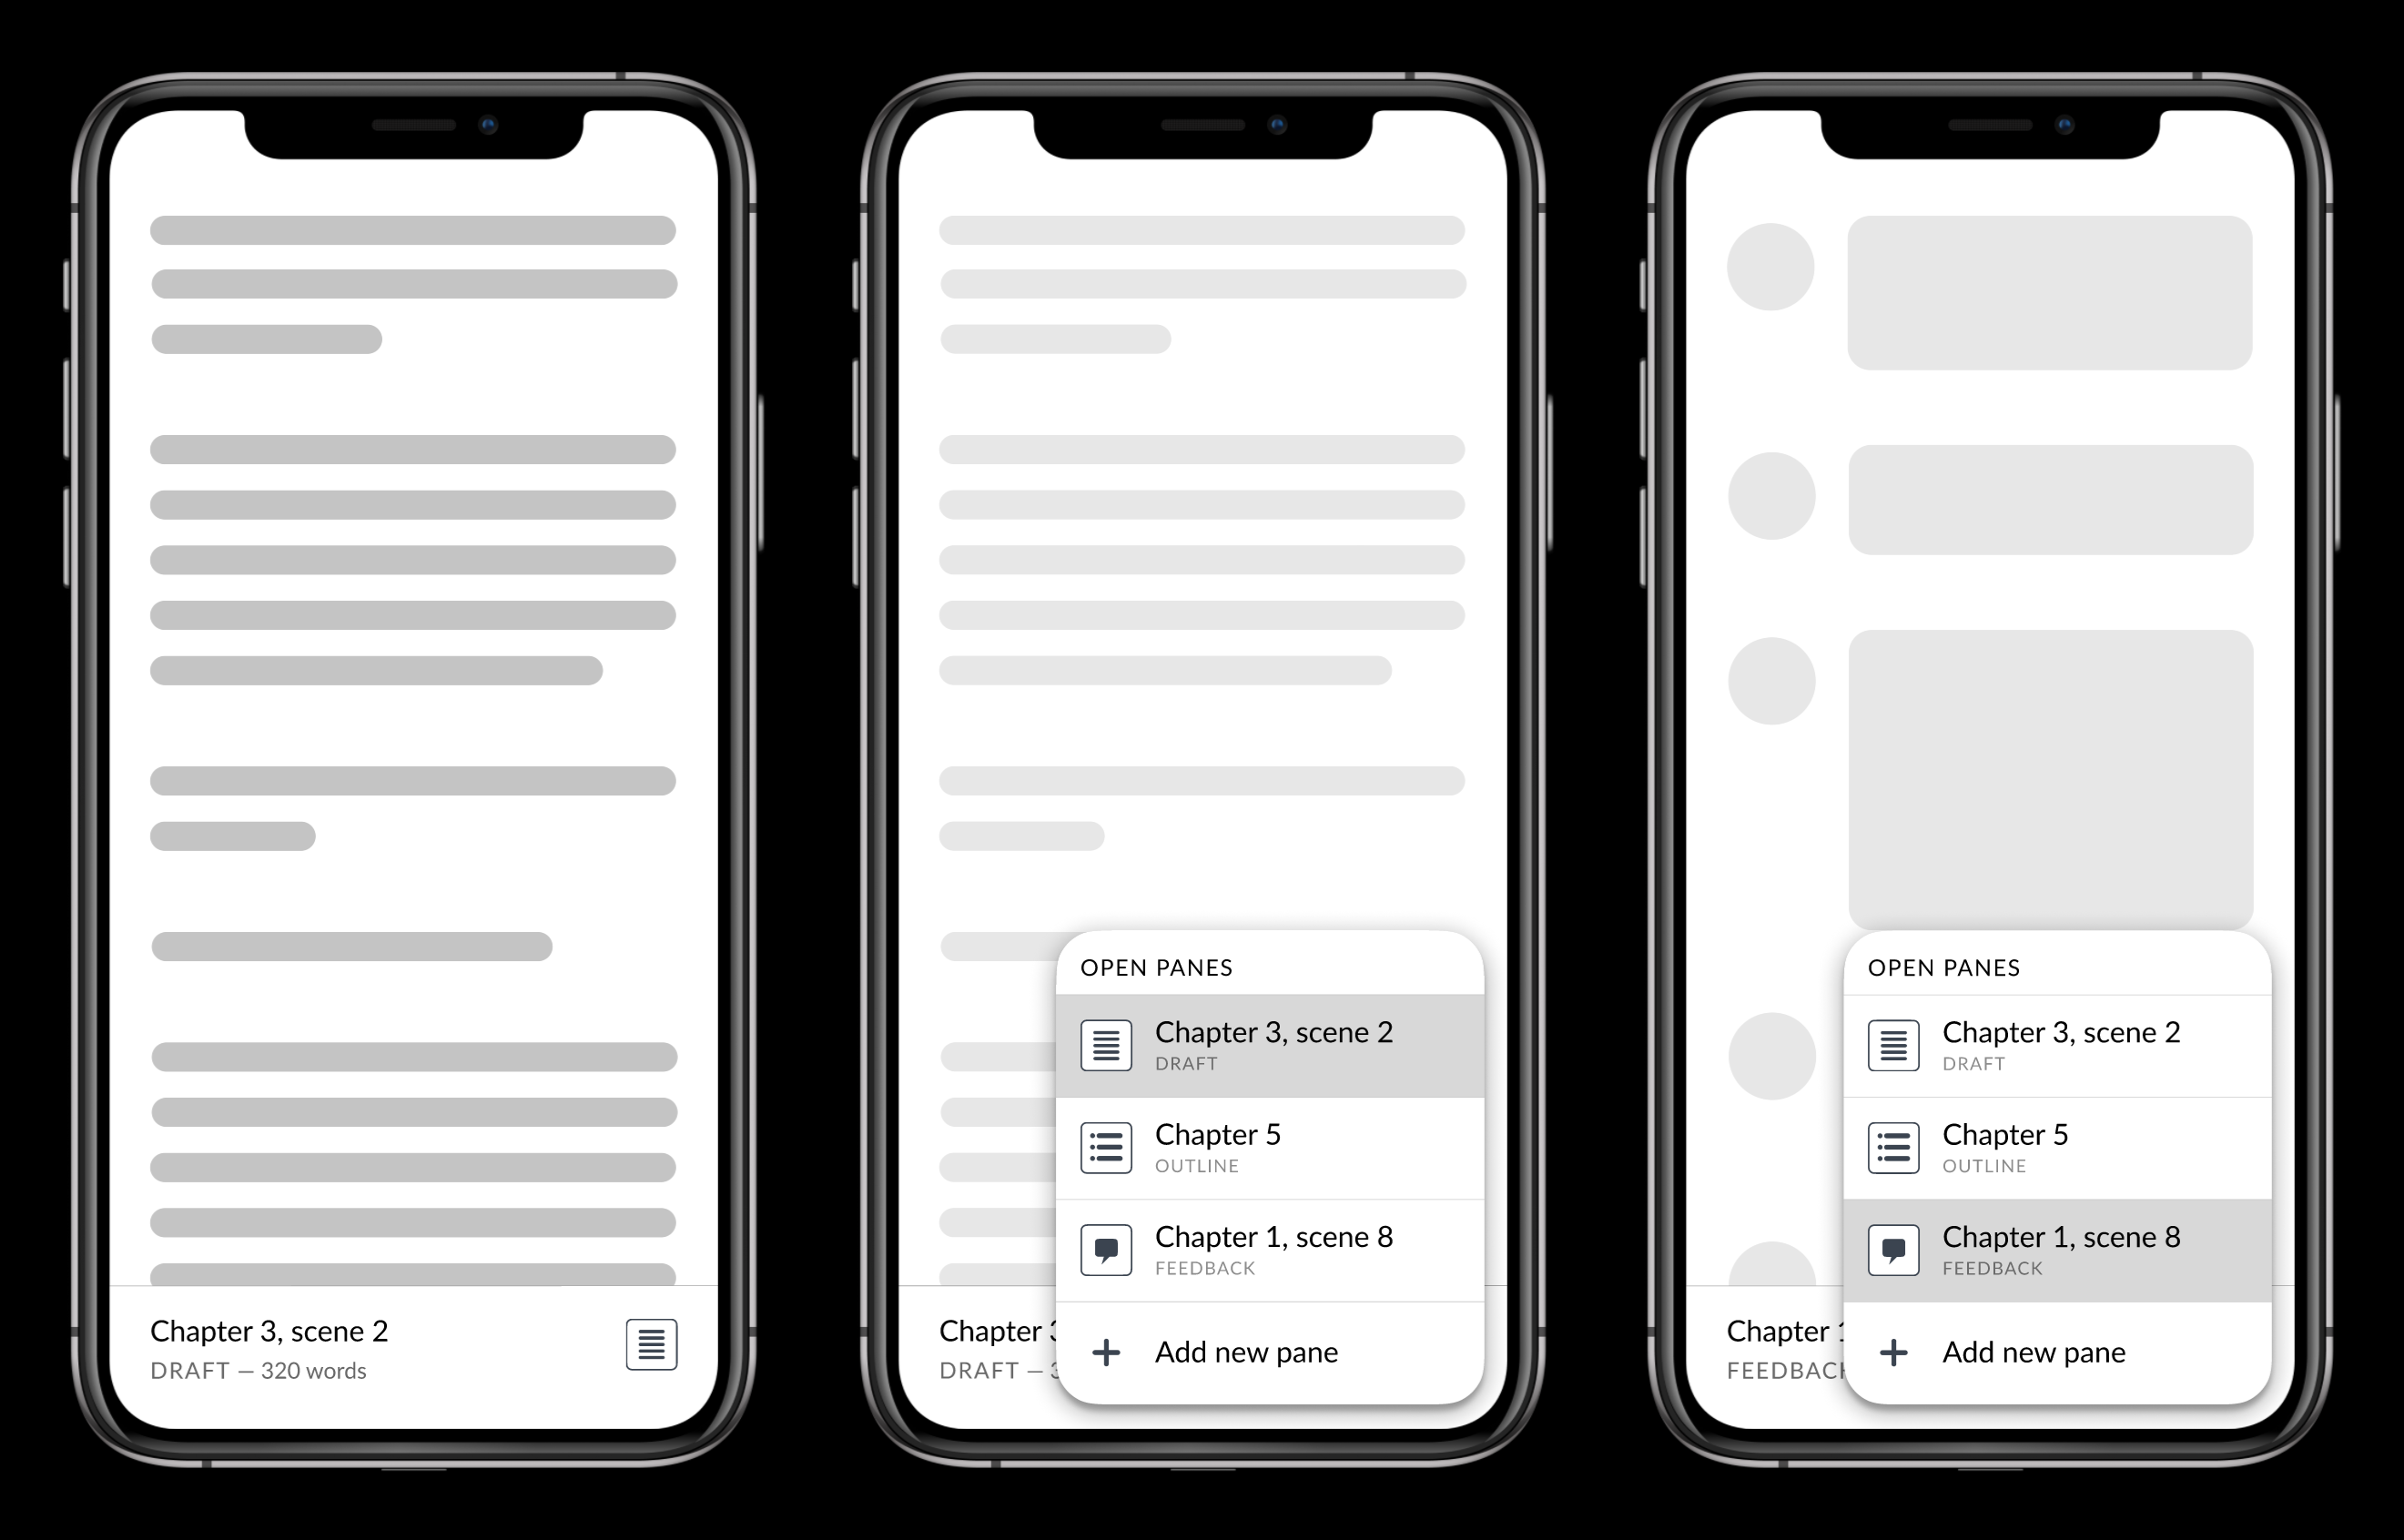
Some of the things I’m thinking about at this point, that I plan to validate and iterate on through testing:
Once I’ve got this sorted out (by testing and iterating), I’ll follow the same process to design the UI for working with panes at larger screen sizes.
The initial version of my design portfolio is now live. Whew. Time for a breather over the weekend and then I’ll be diving back in to work on the next case study, a web-based revamp of Curves. It’ll be a new, graphical tool for designing type, and yes, I’m totally re-using the name because a) I never released the old project with the same name (the Python library), and b) there was actually a graphical version that came first (though I don’t know how much of that initial mockup will make it into the new design).
As I’ve been toiling away on my design portfolio, I realized that a) I haven’t been working in public on this project and b) that ought to change. Which it will. Starting now.
My plan at this point (subject to change) is to design the portfolio site itself first, then post each case study project as I finish it.
Note: the following is effectively an initial draft of a case study documenting the design of the portfolio itself. It’s a little meta, sure, and I expect to replace it in the portfolio as soon as I have enough other projects, but it’ll do for now. And if reading case studies isn’t your thing, stop here!
The goal: to design a site showing what I do as a designer, both in the case studies showcased as well as the design of the portfolio itself.
The main users of the portfolio will be hiring managers and recruiters, who will be evaluating my work to determine whether they should interview me. From what I’ve read, they’re primarily interested in seeing my design process—how I tackle a project, how I solve problems—and secondarily interested in the quality of the final designs. (There’s more to it than that, but you get the idea.)
I began by doing some lightweight competitor analysis, looking at thirty or so portfolios for UX/product designers, and watching a handful of critique videos. By that point I had a good idea of what ought to be involved—initial text describing what I do and what my experience is, case studies documenting my process, a link to my resume, my contact info—and I felt that the site was small enough that I didn’t need to do more formal research at this point. (On other projects, though, this is where I’d do surveys, interviews, card sorting, tree tests, empathy maps, personas, usability tests, etc., depending on what makes the most sense for the project.)
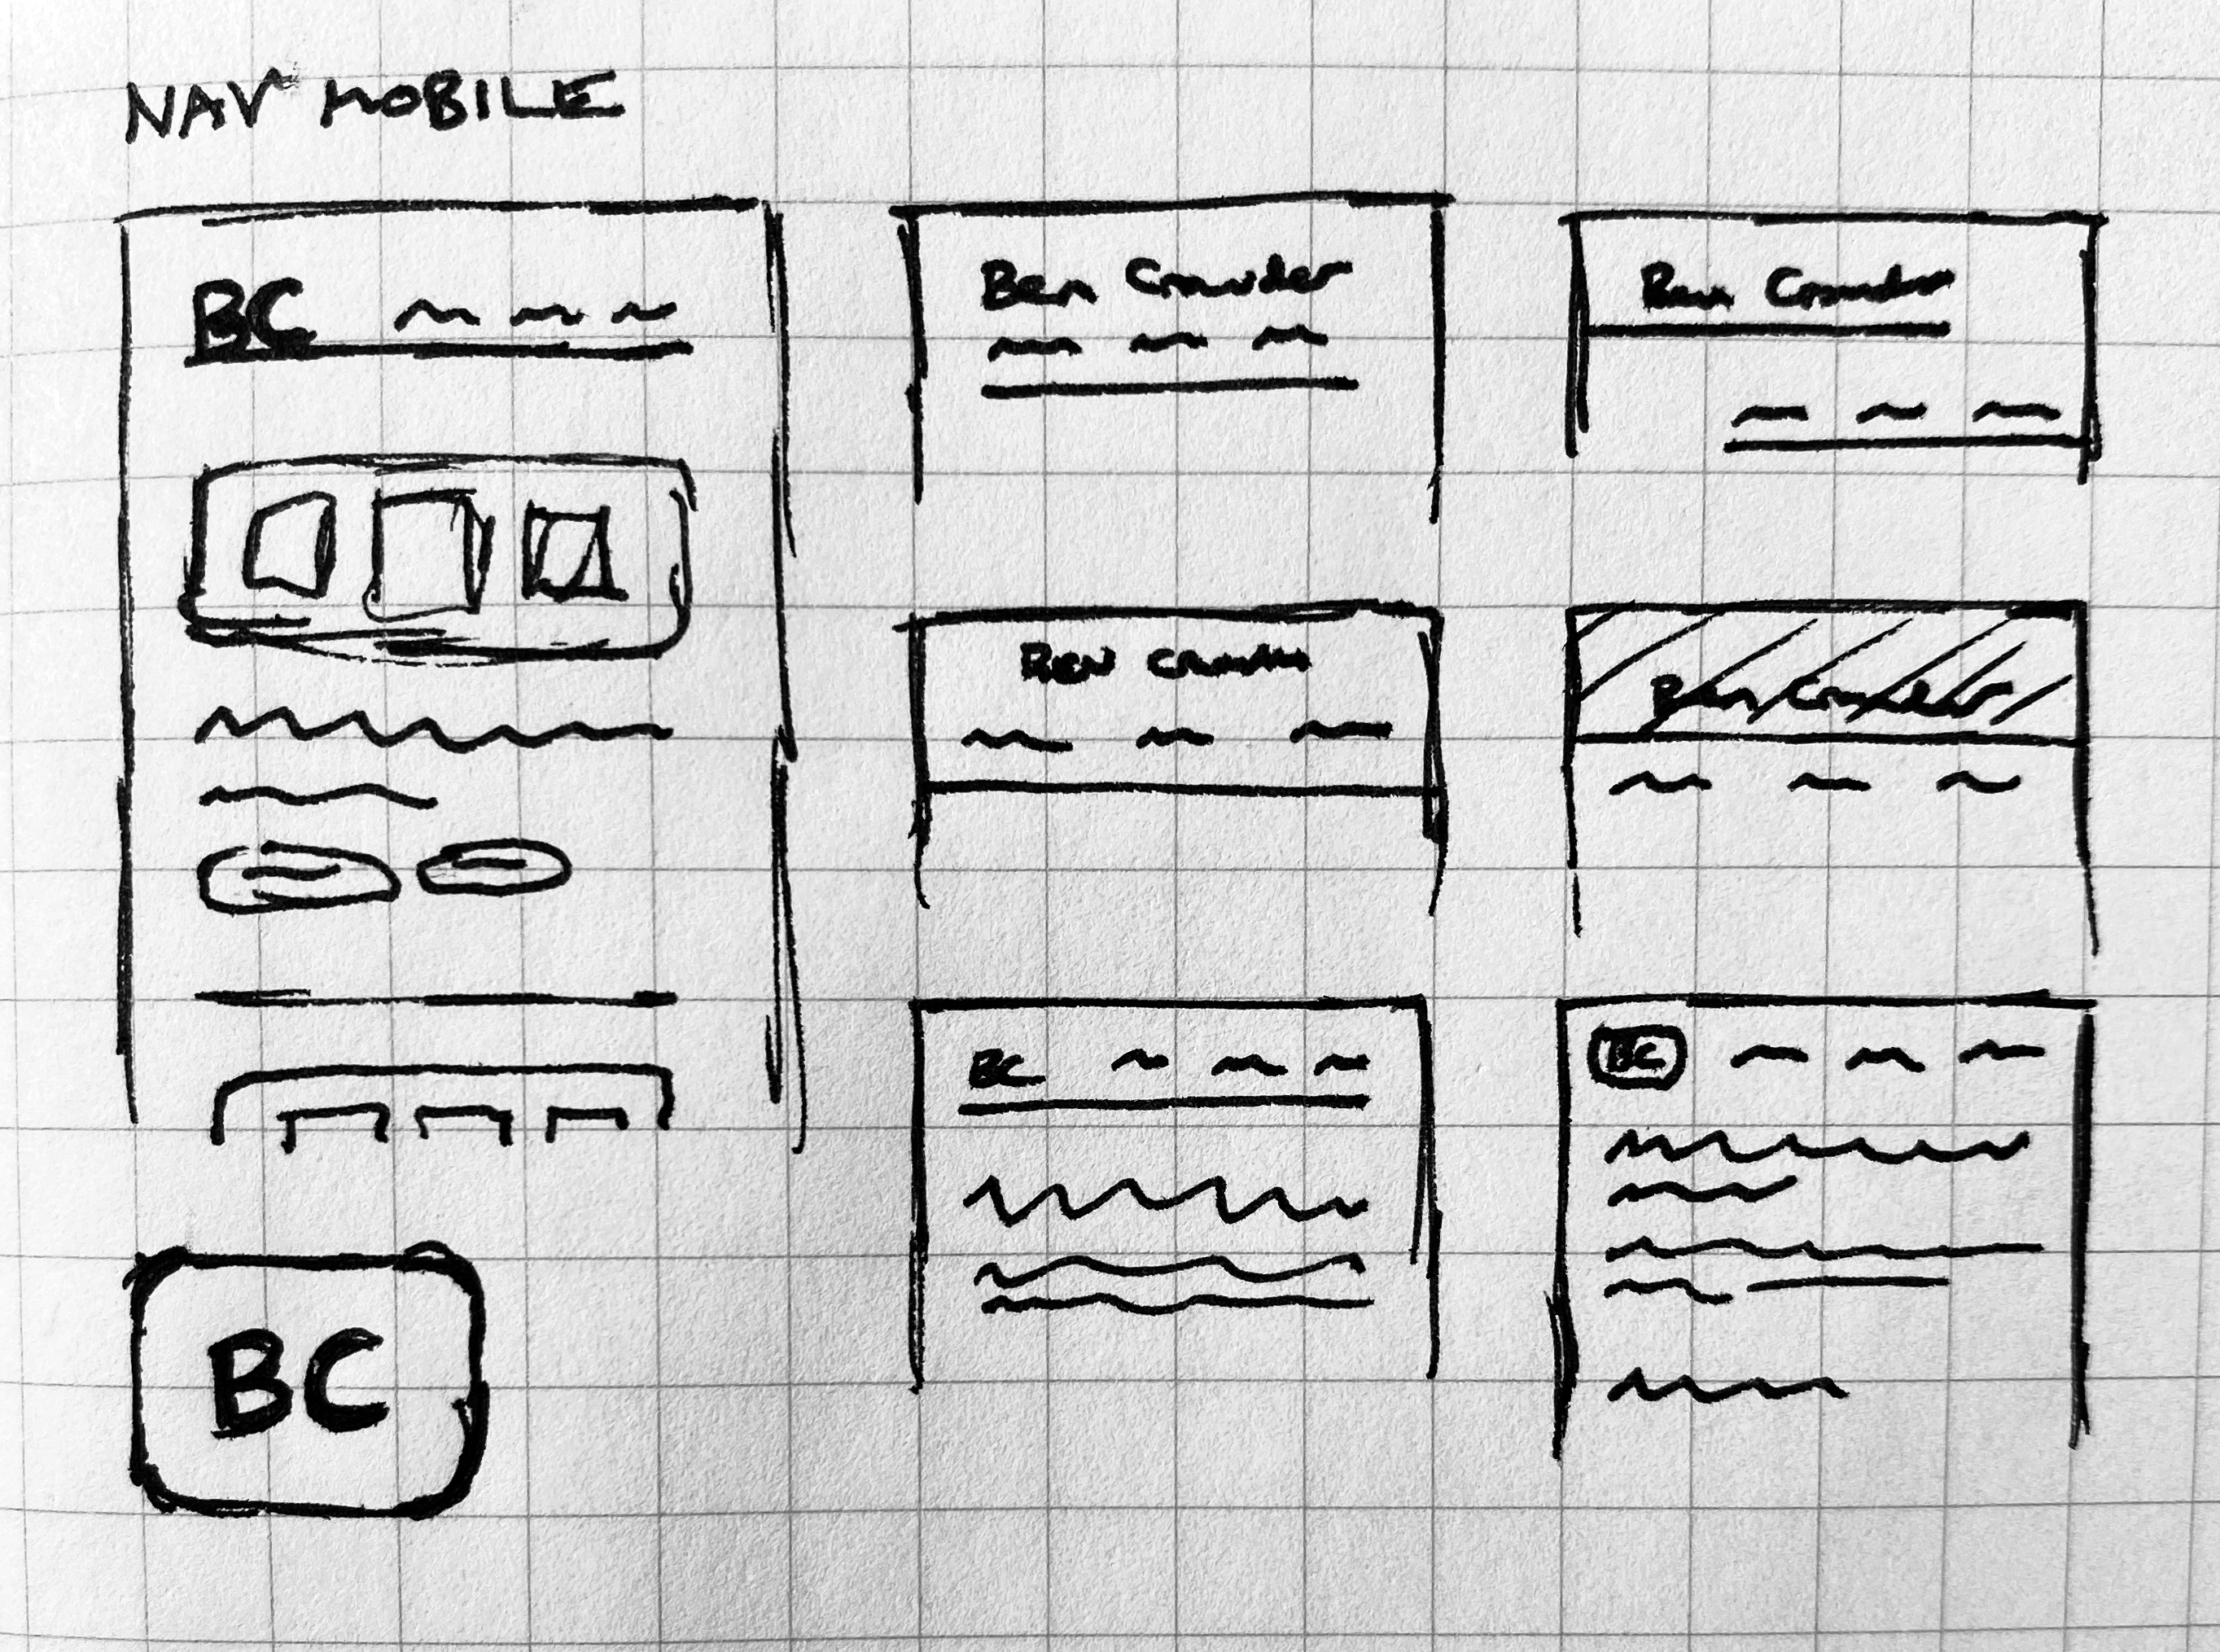
I sketched out some ideas for the nav, starting with mobile first since it’s easier to begin there and scale up to desktop:
I also sketched out some rough layout ideas, with the main focus on the list of case studies on the home page and the case study detail pages.
Last week I was reading about blockframing and have been itching to try it out, so I did:
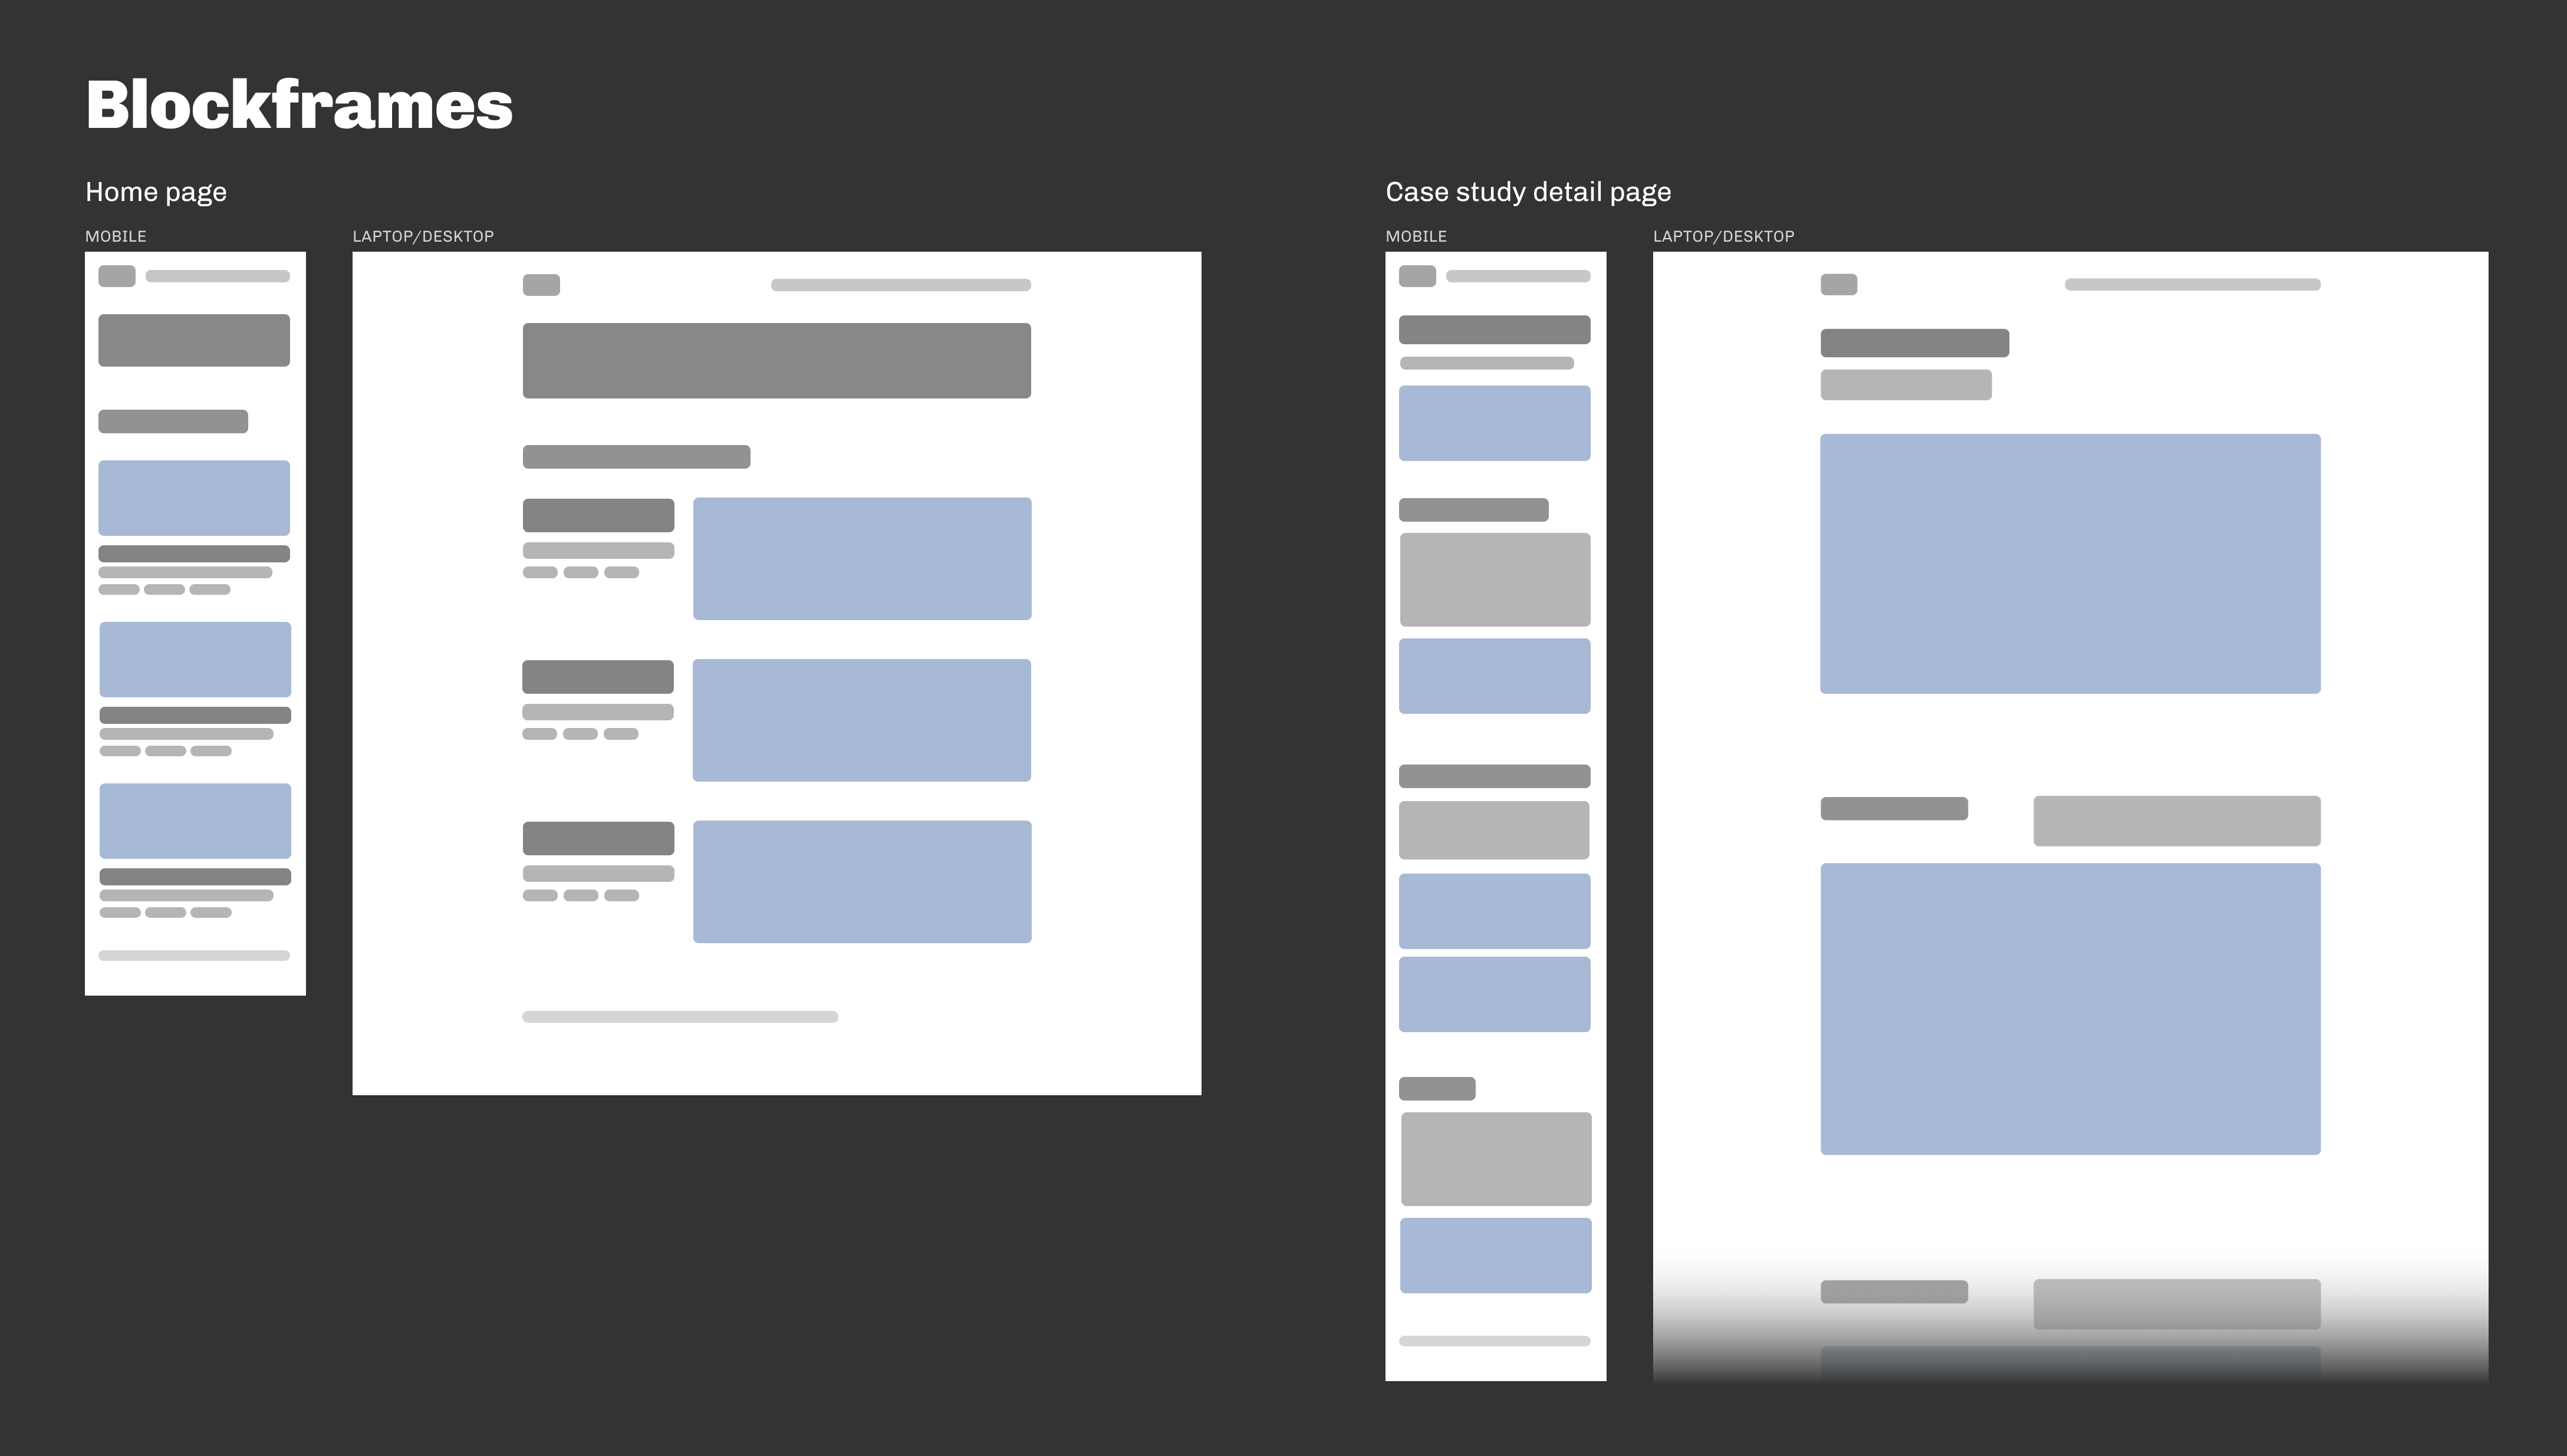
It’s great. Easier to work with than wireframes, which helps in the earlier stages. Definitely planning to continue using it. (I should also mention here—for curiosity’s sake if nothing else—that I used Figma for everything past the point of sketching.)
I continued with wireframes, to flesh out the ideas with actual text (placeholder text, anyway):
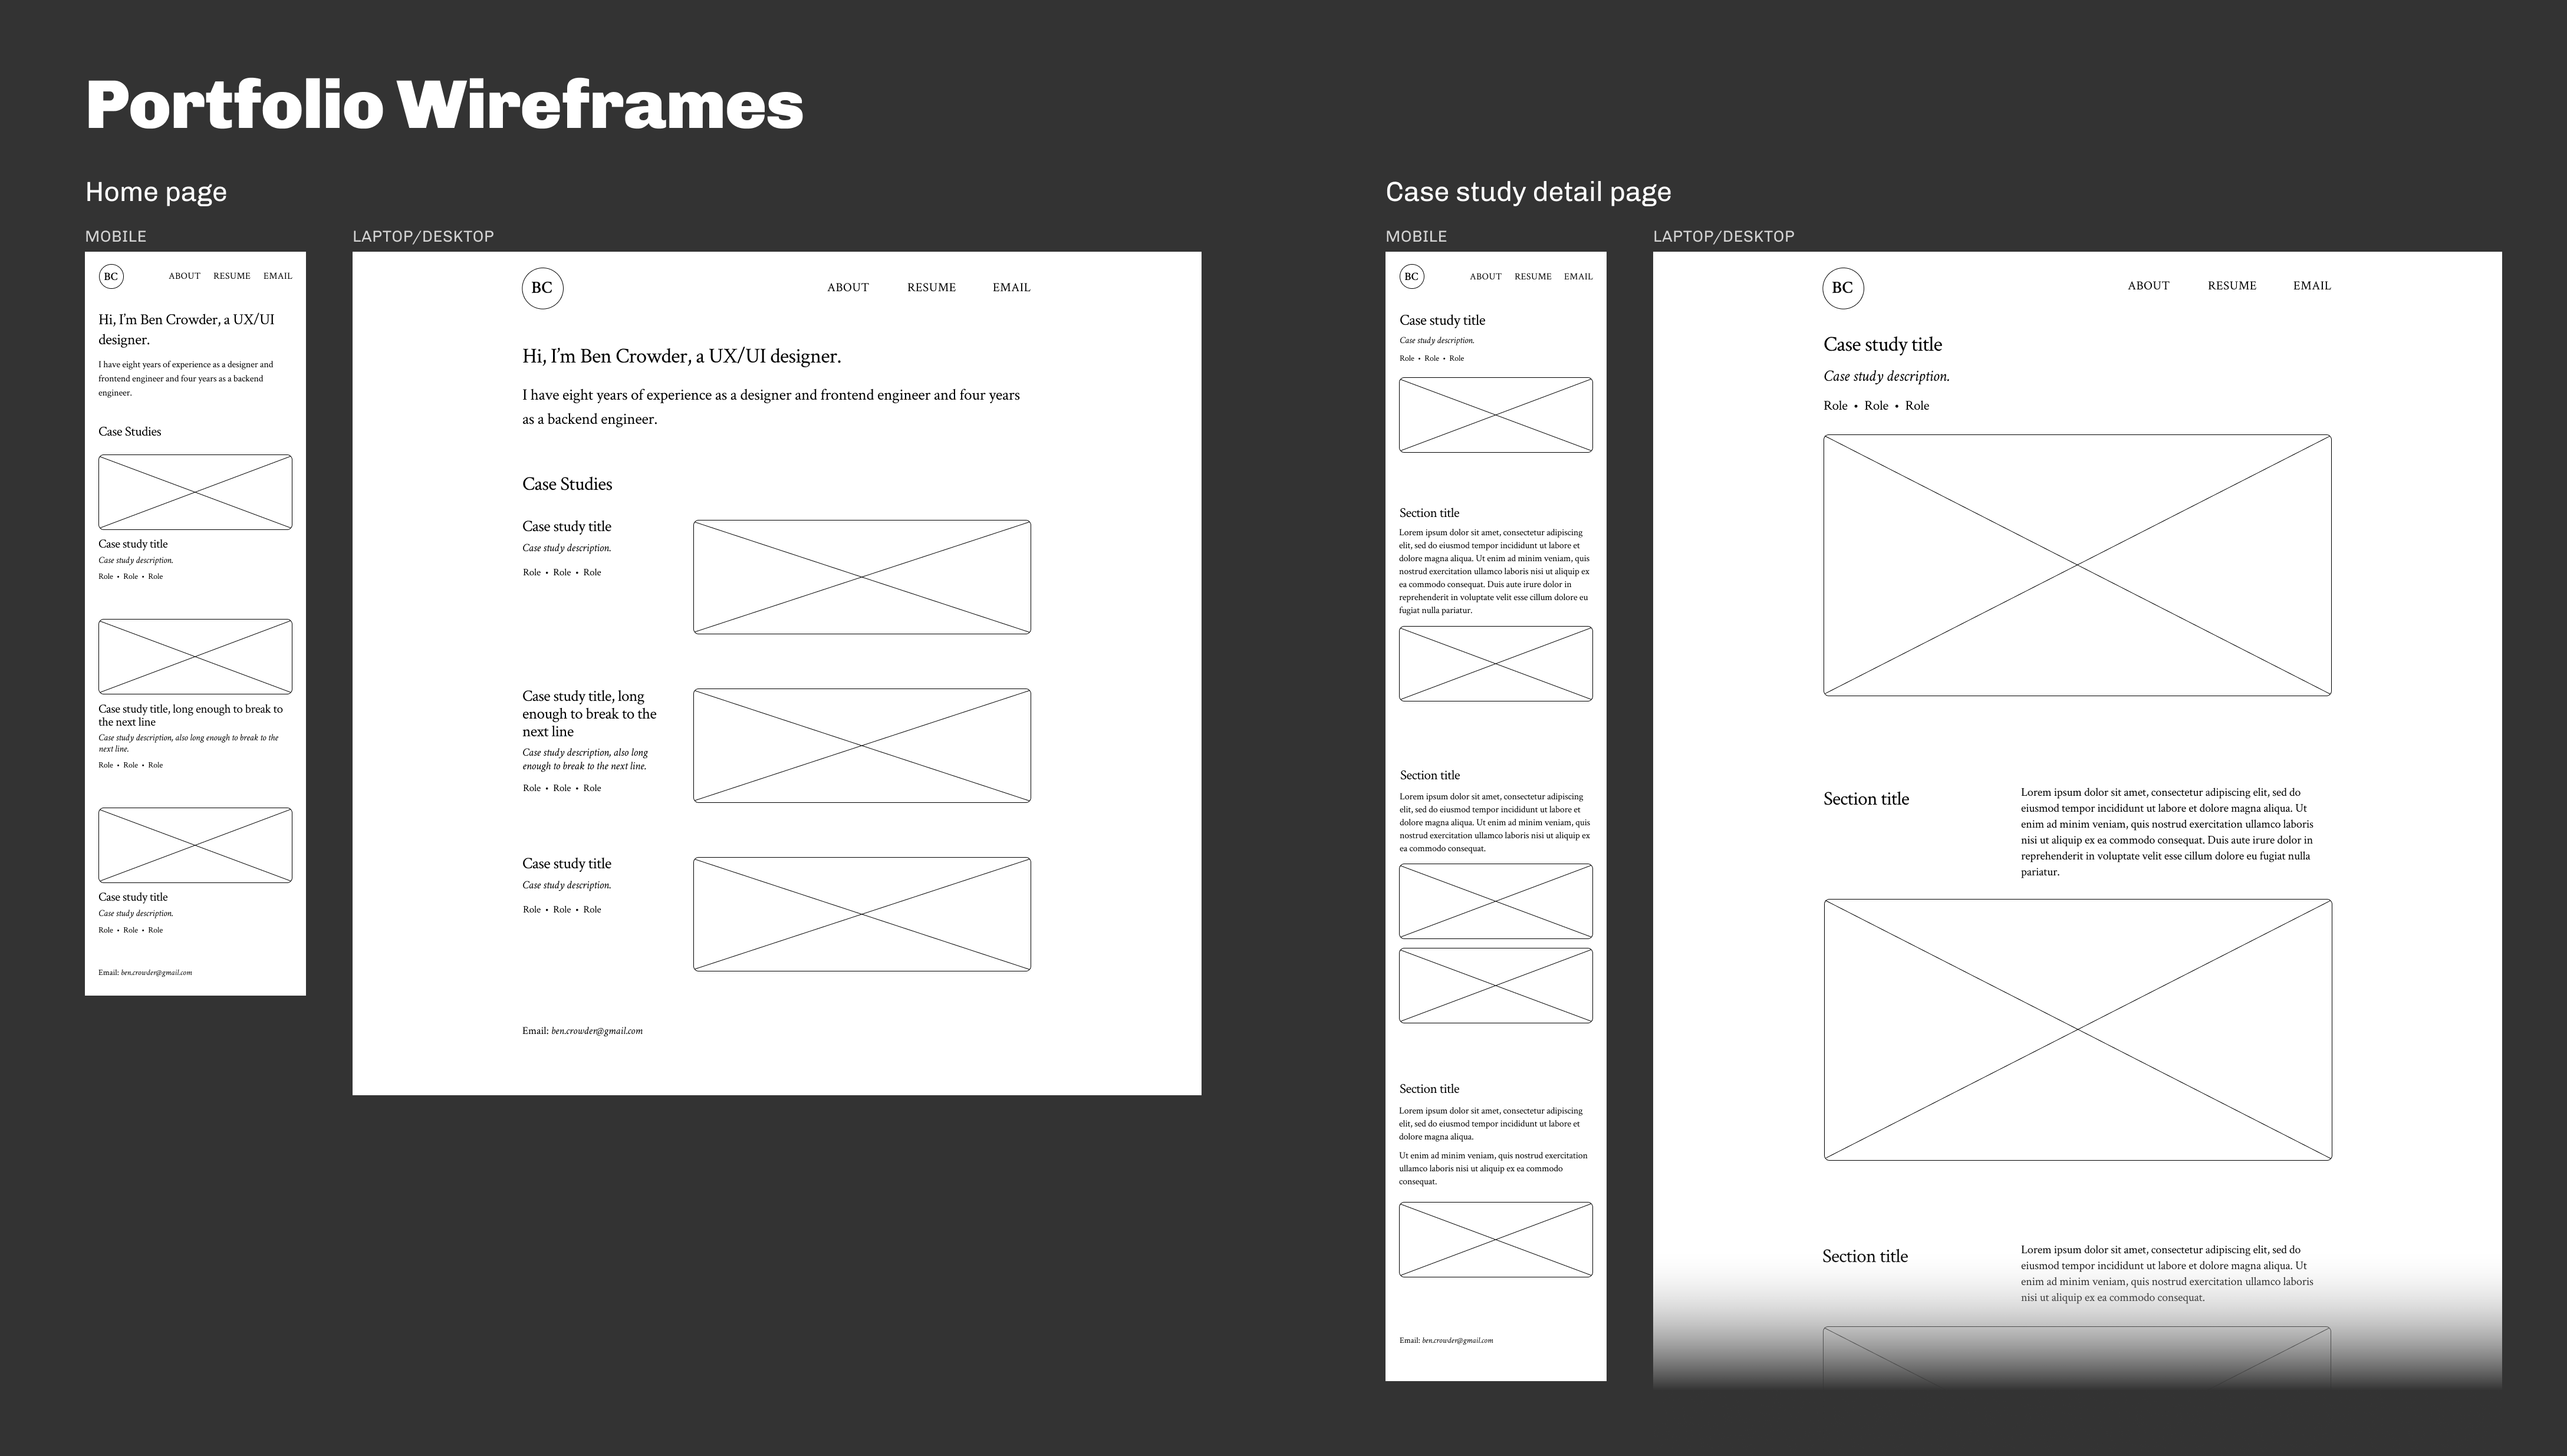
Crimson Text is the primary font (indeed the only font), which I chose because a humanist (old style) serif seemed like the best fit for my personality and the type of design I do.
Next I chose a (very) simple palette:
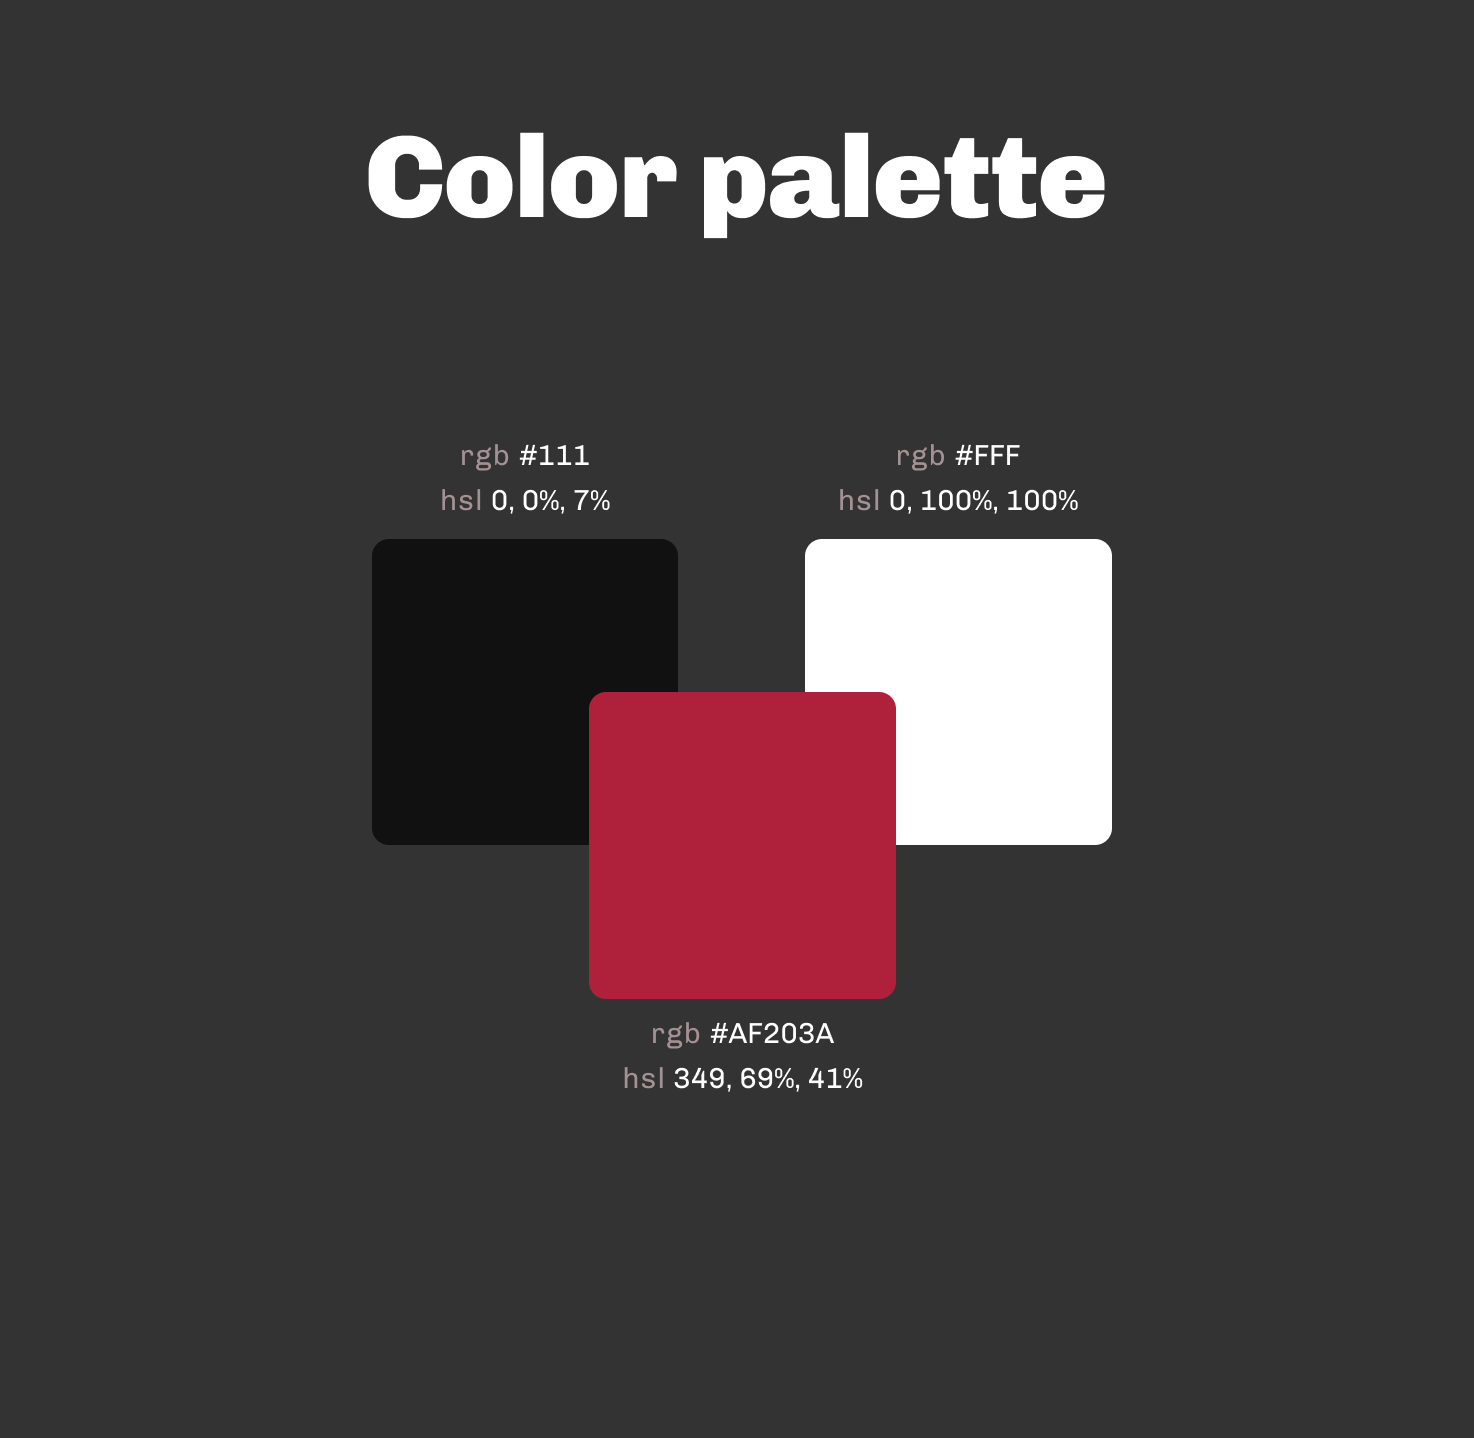
Ordinarily, though, I’d need a more complex, organized color scheme.
And then we come to the high-fidelity mockups (in which the photos are all from Unsplash or Pexels, and the case study text is made up):
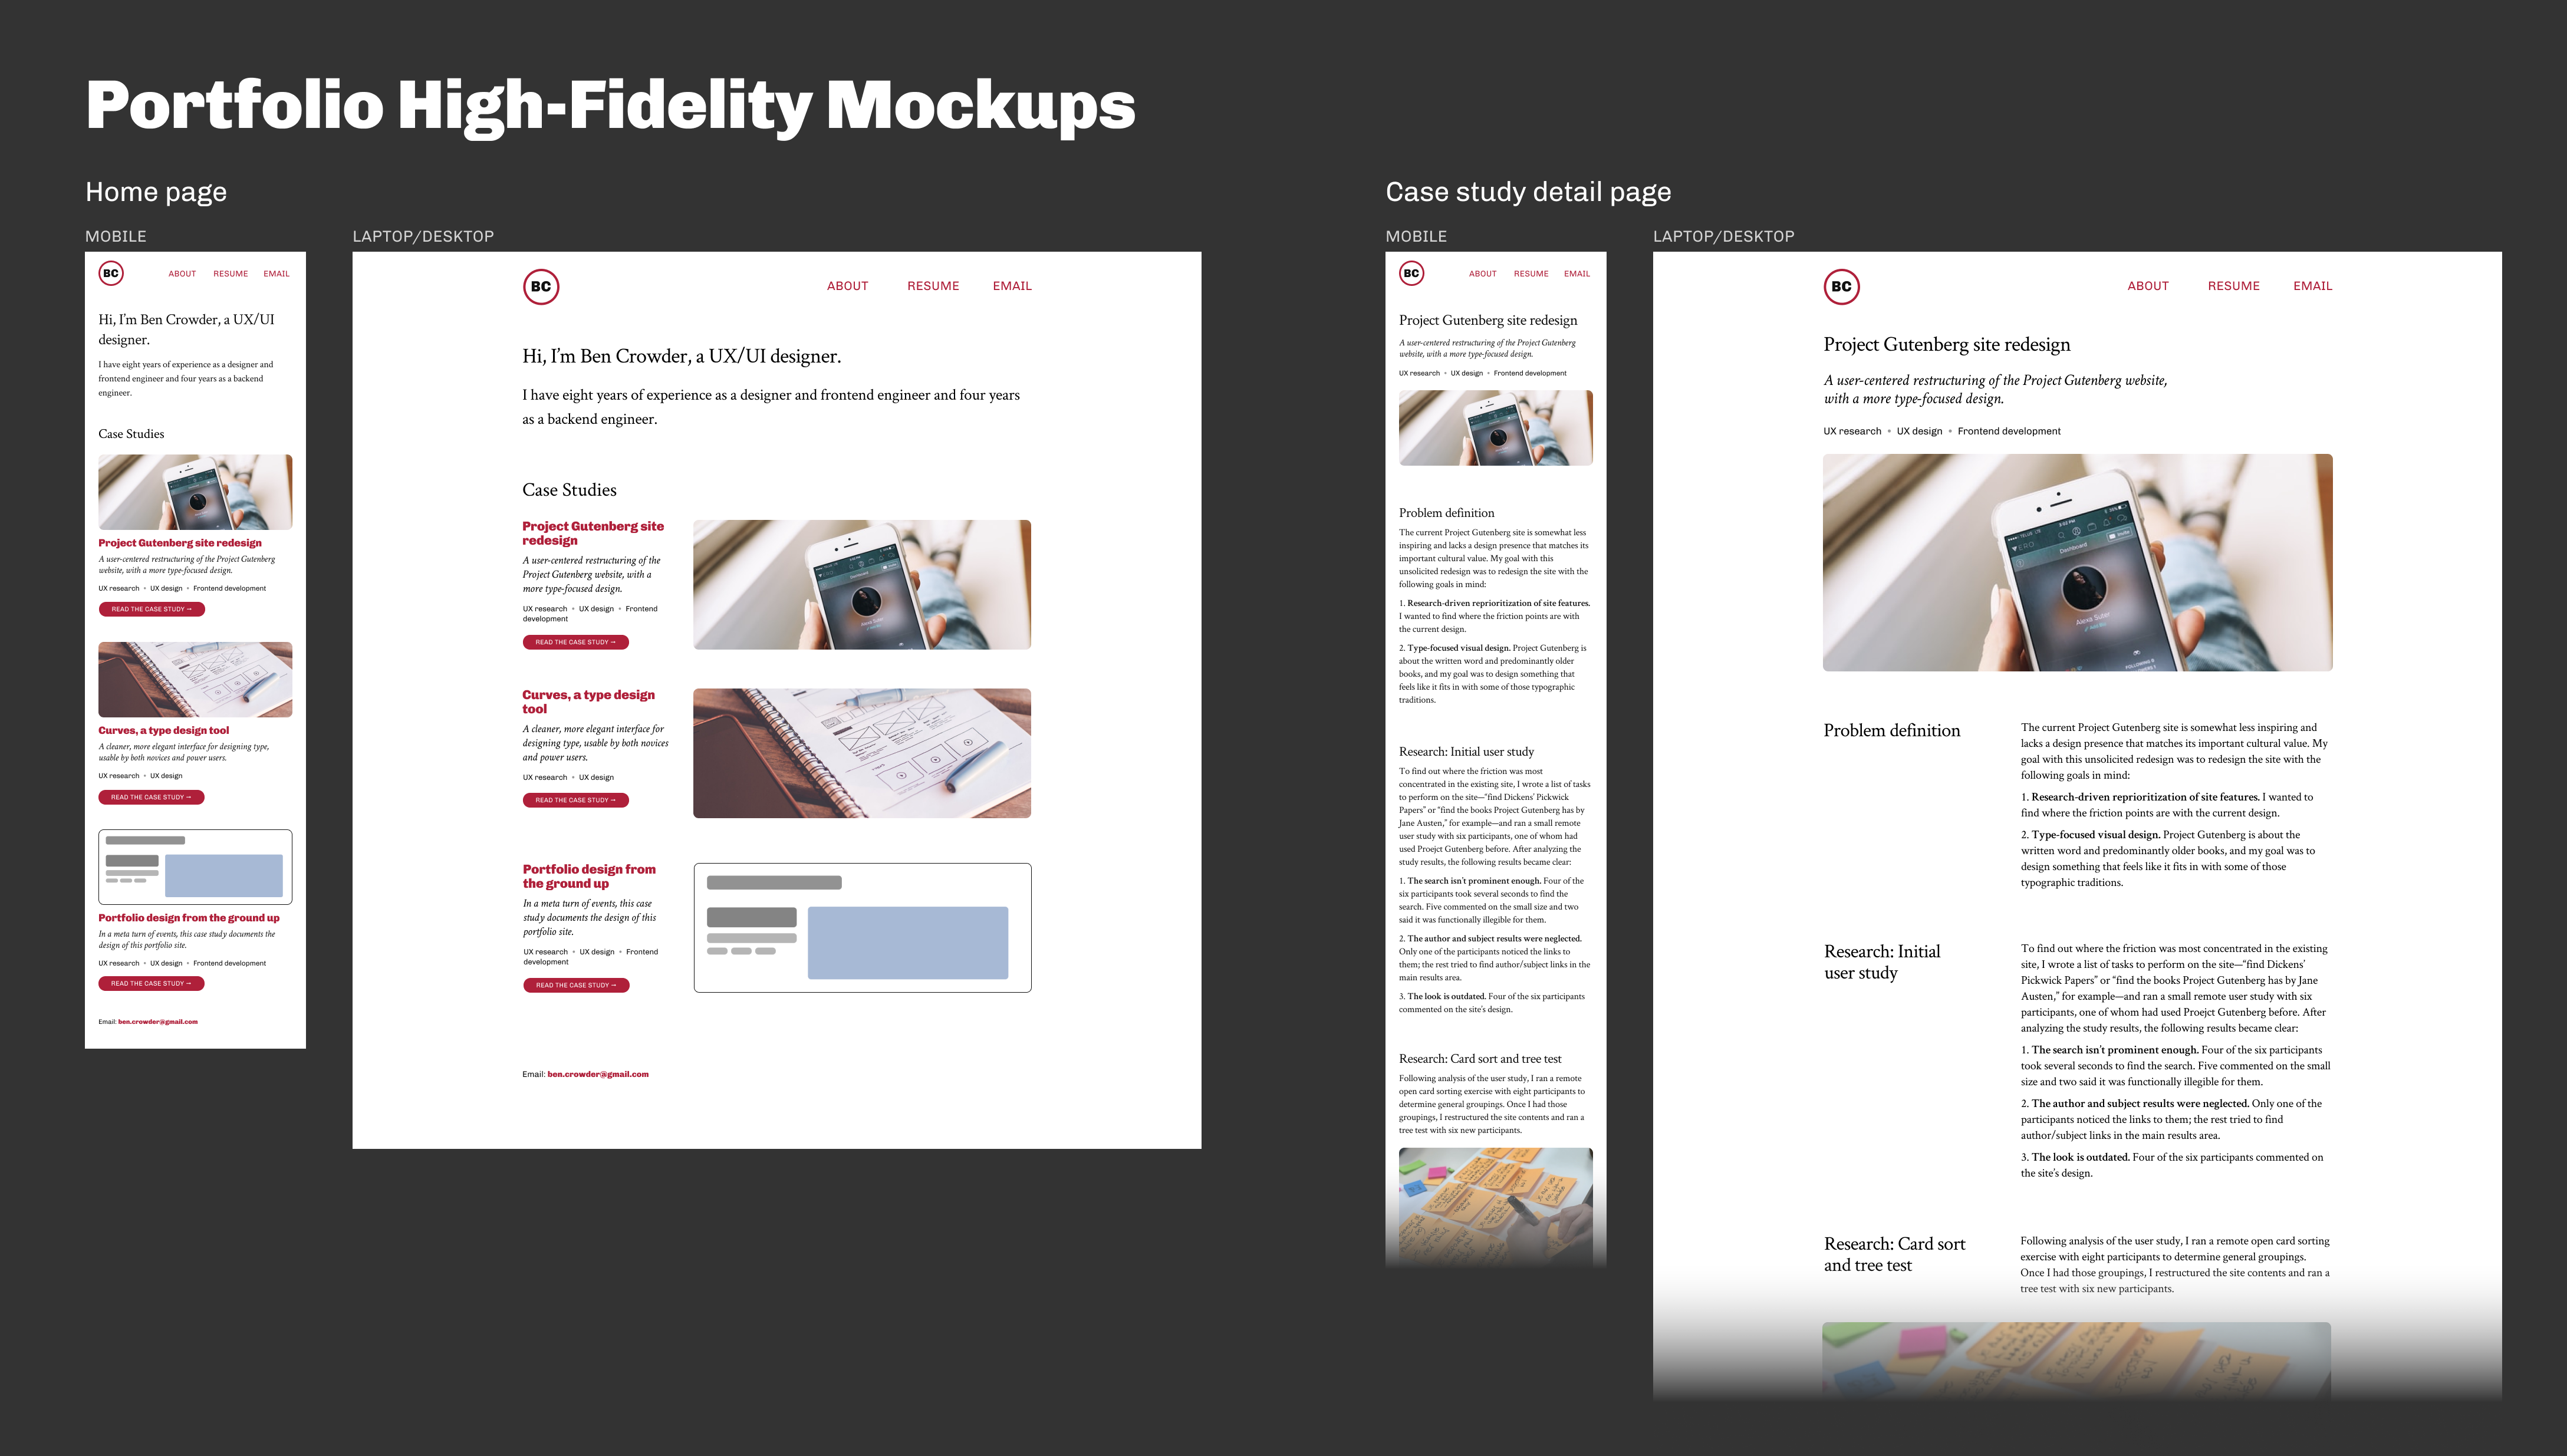
As I applied color, it became clear that the design would benefit from a secondary font, so I added Chivo as a compatible sans-serif. I also added clearer call-to-action links to the individual case study sections on the home page.
Doing some small usability tests to make sure the design works, then straight to implementation. I’m planning to skip prototyping for this project because a) it’s so, so small and there’s not much to prototype beyond dead simple link behavior, and b) with this being a personal project, I’ll be doing the frontend development, and the initial implementation there will be a fairly effective prototype.